This year, Nathan Masters, founder of SimpleShot and FlippinOut Slingshots will be making one custom slingshot each month. The builds will be documented here on our blog so you can see first hand what goes into a custom FlippinOut build. At the end of each month, the slingshot will be offered for sale here on SimpleShot.
For February, Nathan has decided to take it back to the roots... or antler. Here is how it all started:
The first step is finding the 'right' antler...actually either the left or the right will do, symmetry and size is key. Here were the two choices for this build, both came from pet food stores, so be sure to check the antler bin the next time you visit a pet food store...it is senseless to let a dog chew on a perfectly good slingshot! This particular antler is from a white tail deer. Mule deer antlers are usually much more symmetrical and generally make for an easier build.

The lower antler in the above photo was the winner this time. The first cut is done on a bias to the length of the antler to provide plenty of gluing surface and visual interest. Antler is stinky stuff when cut or sanded, so make sure you have good ventilation and your better half is out of the house.


Now, for the first glue up. Two distinct woods were chosen. The darker green wood is Osage Orange that spent 30 years buried in a dam. When it was uncovered, the anaerobic environment caused the wood turn a dark green, rather than the characteristic orange/red color Osage is known for. This process also has made the Osage less photosensitive, causing it to darken with exposure to sunlight. Next, a layer of California Buckeye burl was added. Both pieces of wood have been stabilized in Cactus Juice stabilizing resin to prevent any movement in the final piece.


With this slingshot being of an unknown shape and style, over-sized pieces of wood are used allow for creative shaping later. This is a great use of scrap wood that is too pretty or unusual to throw away and too small to make anything else. Never toss out an interesting piece of wood!

Next, off to the sander to begin finding the slingshot within...


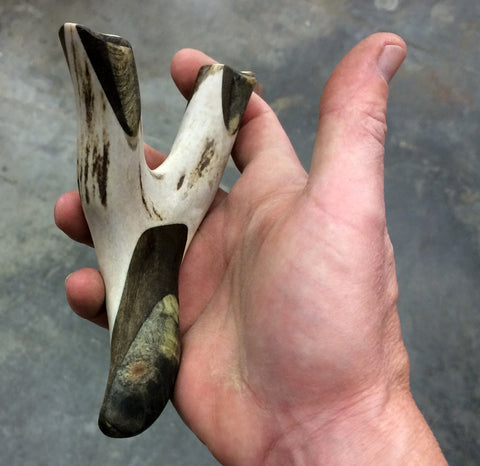
A general shape is starting to appear. At this point the slingshot is assessed as to whether it is a dedicated left or right hand or ambidextrous. Leaving the grip areas alone for bit, it is time to work the fork tips. The tips were squared off and tapered on each side to accept fork tip overlays, in the style of Dan Ford (a very talented UK slingshot maker).


The next step involves laminating material to the tapered fork tips, but not after a quick wipe down with mineral spirits to get a sense of how the wood grain will look when finished.
Up next... working on the fork tips. Stay tuned.
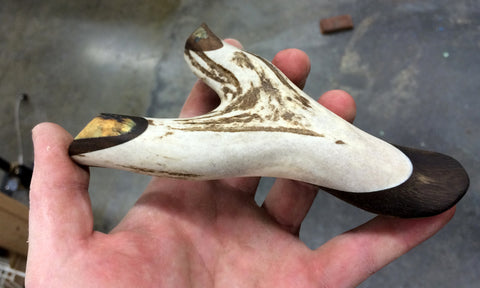
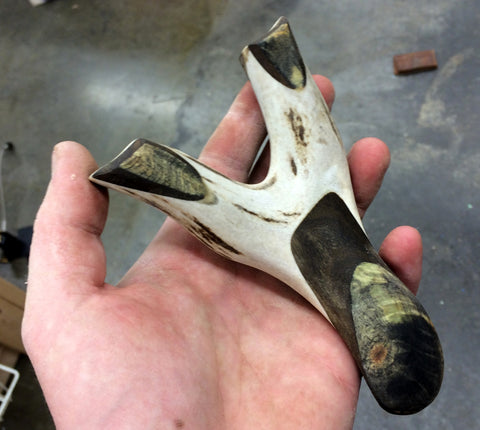
The fork tips needed considerable material added in order to provide a good mounting surface for the bands. Once again, the Osage Orange and Buckeye Burl were used. Here they are after the initial shaping.
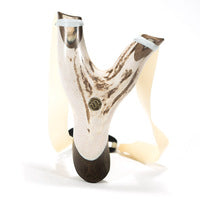
Now, time to band it up and give it a few test shots... then back to the workbench.
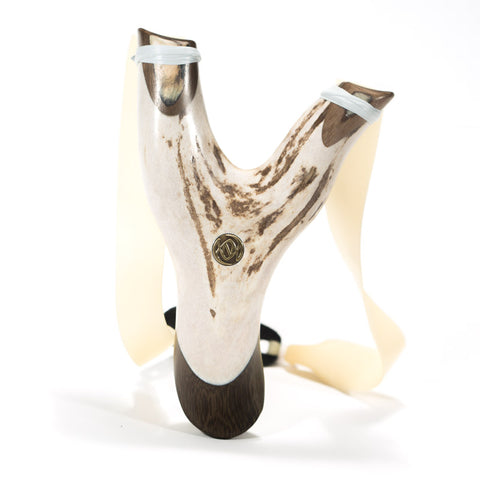
All finished up! Slingshots such as this one are always a surprise. The best made plans often go awry and what the craftsman had in mind at the beginning can often be quite different in the end... but always worthwhile. This particular slingshot finished up beautifully. Although it fits the right hand best, it is still quite ambidextrous. It shoots as good as it looks.
